Keep in mind when equipping a glass shower structure:
1st piece of advice. The shower tray
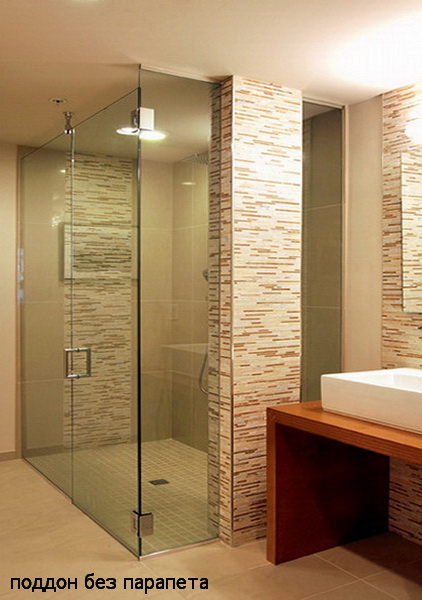
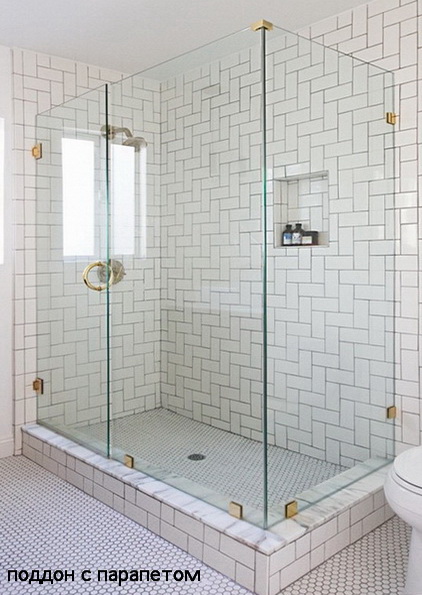
Decide which type of shower tray you prefer. We recommend building it from ceramic tiles when arranging the bathroom floor. Such built-in trays look most elegant without parapet equipment. The absence of a parapet also provides easy and convenient access to the shower cabin. This is especially important for children, the elderly, or people with physical disabilities. It is important to provide a slight slope (-10 mm) to the shower drain.
If the design of the drain you have chosen requires an increase in the floor level in the shower area or you want to temporarily prevent water from leaking out in the event of a clogged drain outside the shower stall, the equipment of the tray with a parapet solves these problems.
*** Avoid using low quality cheap plastic shower trays. Under the weight of a person taking a shower, such trays experience constant deformations, which sooner or later leads to depressurization of the connections of the elements of the water drainage system and the seams of the tray adjoining the walls. Water leaks will have disgruntled ground floor neighborhoods knocking on your door. If you nevertheless opted for a ready-made prefabricated pallet, use a more reliable and durable pallet made of ceramic or composite materials such as artificial stone.
2nd piece of advice. Slope incline for water drainage
The upper surface of the parapet and the surface of the floor should have a slight slope of ~ 5 ° inside the shower stall towards the drain to ensure reliable drainage of water. The absence of such a slope will cause the accumulation of water on the surface of the parapet, and its slope outward will cause water to flow out of the shower stall.

3rd piece of advice. The prior preparation of the walls
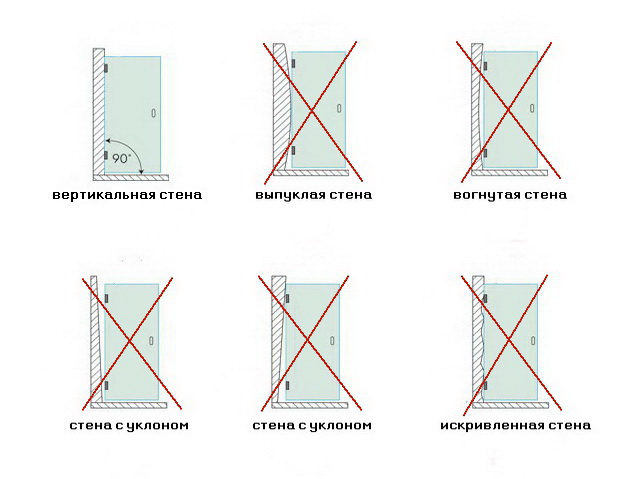
The walls of the room, to which the glass panels of the shower structure will be adjacent, must be strictly vertical, i.e. not have a slope in any direction, not bulging, concave or wavy. High-quality preparation of the walls will avoid unsightly gaps, uneven connections, leaks and jamming of the hinges. In practice, when installing 2/3 of all realized glass shower structures, we encountered walls that were not perfectly even. This is a fairly common problem that we often manage to solve. However, the permissible curvature of the walls still has its limits. For swing leaves, it should not exceed 6 mm and may be slightly larger for fixed glass sheets. The curvature of the walls, measured by our experts, is taken into account in the design and manufacture of glass elements and allows them to be installed right next to a non-ideal wall.
4th piece of advice.The size of the glass elements
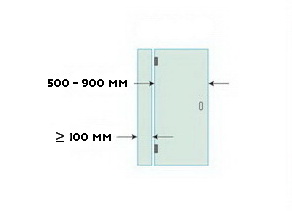
Consider the size limitations of glass panels when planning your glass shower design. The element width must not be less than 100 mm. This is necessary for fixing fittings and is also the minimum width of the tempered glass produced. Movable hinged leaves must not exceed 900 mm in width.
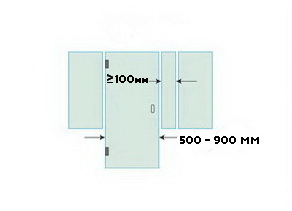
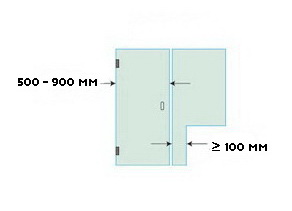
5th piece of advice. Overhangs and soffits
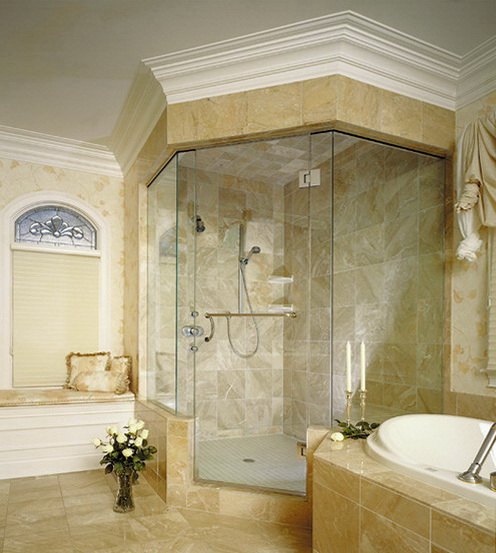
When equipping a glass shower stall with an overhang (soffit), it must ideally reflect the dimensions, configuration and angles of the tray parapet, otherwise the design will be sloppy.
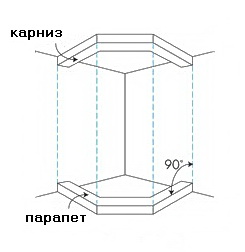
6th piece of advice. The shower head placement
To avoid leaks, do not install the shower head opposite the cabin door or other openings in the shower structure. It is desirable that the water jets be directed towards a wall or fixed glass panel.
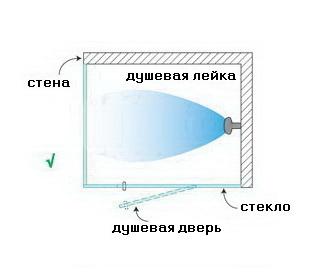
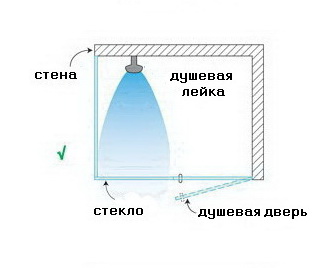
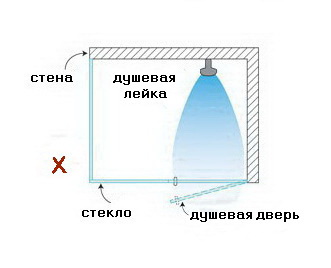
7th piece of adviceEmbossed cladding tiles and other protruding elements
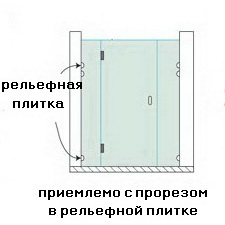
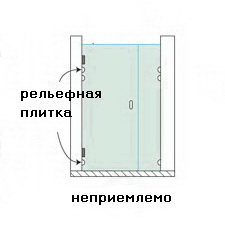
When installing glass shower doors, it is necessary to exclude gaps between the wall and the door leaf, and also to ensure that there are no interferences for the free opening of the glass sash. Such obstacles can be embossed wall tiles and protruding fragments of the cladding of horizontal surfaces of walls and seating areas made of granite or marble. If you are faced with such a problem, the best solution would be to use a narrow fixed glass panel adjacent to the problem wall, to which the swing door leaf will be fixed on glass-glass hinges. In this case, the help of a qualified tiler will be required to arrange the slots in the protruding cladding elements, which are necessary for the fixed glass sheet to fit snugly against the main wall.
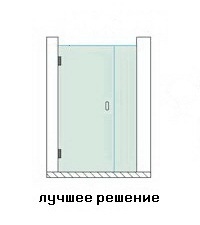
8th piece of advice. Cladding of the upper horizontal sides of parapets, partitions and seating areas
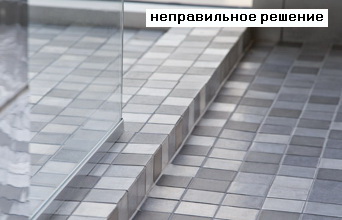
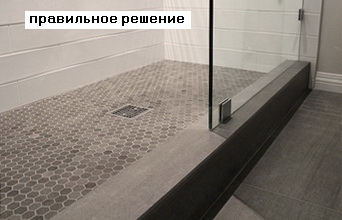
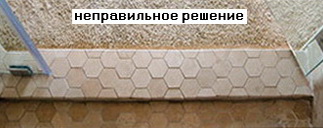
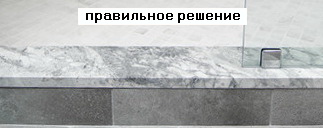
We do not recommend using mosaic or small-scale tiles for the horizontal parts of parapets and walls. It should be noted that on such horizontal surfaces, especially in the places of tile joints, moisture will accumulate, penetrating into the thickness of the mortar on which the tiles are laid. This can lead to the formation of mold and mildew in these areas. The preferred solution would be to use a solid piece of marble, granite or large-scale tiles. The gaskets with which we equip our shower doors provide the best tightness when in contact with smooth surfaces.
9th piece of advice. Electrical wiring and other hidden systems
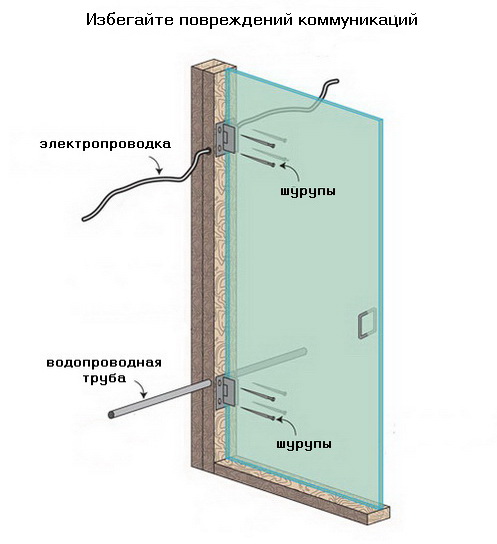
When preparing the room, make sure that electrical wiring, water pipes or underfloor heating are not laid in such a way that they interfere with the installation of fittings for your glass shower structure.
10th piece of advice. Ventilation
Unlike shower partitions, the closed circuit of the shower enclosure prevents the free flow of fresh air. We recommend leaving a 50-60 cm opening above the cabin door for natural ventilation or equipping an extractor hood inside the shower room. Otherwise, the person taking a warm shower may experience serious discomfort from repeatedly inhaling unrefreshed, waterlogged air. In this case, there is no need to worry about water splashing from the shower head outside the cabin through the ventilation opening in the upper part of the cabin. With the right design, this problem will be eliminated.
11th piece of advice. Drafts
Shower structures such as glass barriers or shower screens have their own specifics. The fact is that streams of water rushing from the shower head draw the surrounding air into intensive movement. If the shower cabin is not a structure with a closed circuit around the perimeter, intensive mixing of air occurs not only in the shower area, but also throughout the entire premises of the bathroom. In cold seasons, this can lead to a situation where, along with pleasant warm jets of water, your body will periodically be doused with currents of cold air. Few would find such sensations comfortable or pleasant. Therefore, if you prefer a glass shower partition rather than a shower cabin, ensure high-quality insulation of all walls of the bathroom and a sufficient level of room heating.
12th piece of advice. Caring for your glass shower structure
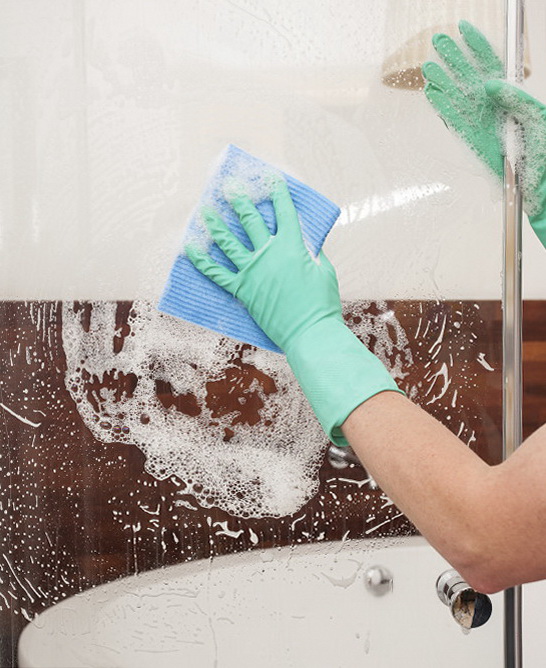 During use, surface mechanical contamination in the form of plaque, splashes or stains may form on the glass panels of shower structures. Such contamination can be removed relatively easily with a wet rag. Soaps, shower gels, shampoos, and tap water minerals cause chemical impurities to form a thin film or whitish drip, which causes tarnishing of the glossy glass surface. Chemical contaminants often cannot be washed off with water; they will need to be dissolved with an appropriate reagent.
Modern glass care and cleaning products can effectively and safely remove mechanical and chemical buildup, returning your glass shower structure to its original chic appearance. It is important to avoid using non-glass cleaners, as they may contain coarse abrasive components. Such materials, as well as sponges made from metal shavings or other abrasives, can damage the glass surface, impairing its transparency and gloss.
There are also a number of simple tricks and “folk remedies” to keep your glass shower clean:
- Whenever you finish showering, rinse the glass walls of the cabin with warm water. If at the same time you were to also use soft sponge, you practically won’t need any additional glass cleaning and the use of household chemicals;
- Prevention is the key to results. Use a basic elastic glass scraper after every shower. It can be stored on a shelf or hook inside the shower stall. By immediately brushing off remaining drops and smudges, you prevent minerals and impurities dissolved in water from settling on the glass;
- Instead of harsh chemicals with an unpleasant odor, you can use equal parts dishwashing liquid and vinegar to clean glass. Preheat the mixture in the microwave for one minute and you have a great cleaner for glass and other bathroom elements. If you use natural stone in your shower room, using vinegar can damage it. In this case, use a mixture of dishwashing liquid and baking soda. Wipe the glass with a soft sponge soaked in any of these solutions and rinse with warm water;
- The lemon trick: Cut a lemon in half, dip the half in baking soda, and rub the glass in the shower. After rinsing the glass with water, you can rub the glass with a little lemon oil. The oil will repel water and prevent it from drying on the glass.
*** Please also take our recommendations into account when choosing glass for a shower cabin. Go to the section “Glass for shower cabins” …
 TM
TM
